



| | |

Homemade Brazilian Cheese Bread (Pão de Queijo) (with Dairy-Free Option)

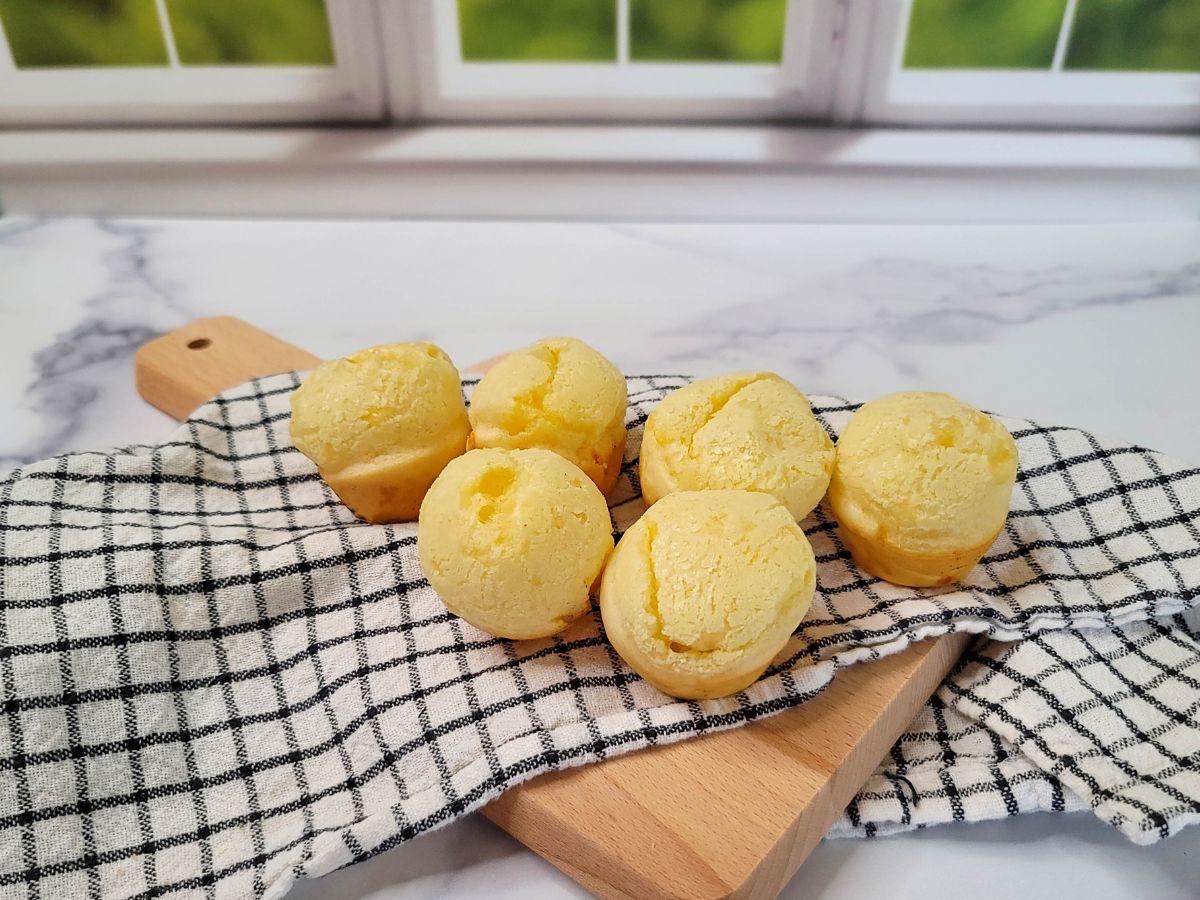
A pile of golden cheese breads, one broken open to reveal a fluffy interior.

The first time I tried Brazilian cheese bread, the year started with a “1,” and the only Fogo de Chão in the United States was located in Dallas. Under the close supervision of her Brazilian mother-in-law, one of my American co-workers whipped up a gigantic batch of these cheesy bread bites for a potluck. The tasty tidbits immediately became a hot topic as a bunch of Midwesterners fell in love at first bite with this traditional Brazilian treat.

Today, many Americans have tried Brazilian cheese bread, or pão de queijo. It’s served as a side dish at Brazilian steakhouses from coast to coast, and you can bake frozen Brazi Bites at home. And today, I’m going to show you how fast and easy it is to whip up a batch of delicious Brazilian cheese balls at home.

Why You’ll Love this Brazilian Cheese Bread Recipe

  • It includes a dairy-free option. If you’re an alpha gal who avoids dairy, you can make dairy-free Brazilian cheese bread with your favorite plant-based milk and dairy-free shredded cheese.
  • It’s naturally gluten free. Brazilian cheese bread is made with tapioca flour instead of wheat flour, giving these little pão de queijo bites their signature chewy center and crisp edges.
  • The blender does most of the work. Add the ingredients, blend until smooth, pour the batter into a mini muffin pan, and bake. No kneading, no yeast, no waiting around for dough to rise.
  • It’s ready fast. This Brazilian cheese bread recipe comes together in about 25 minutes, making it easy enough for a weeknight side dish, snack, or last-minute appetizer.

To help offset the costs of running SageAlphaGal.com, you’ll find affiliate links lightly sprinkled throughout the site. If you choose to make a purchase via one of these links, there’s no additional cost to you, but I’ll earn a teeny tiny commission. You can read all of the legal blah blah blah (as my little niece says) on the full disclosure page.

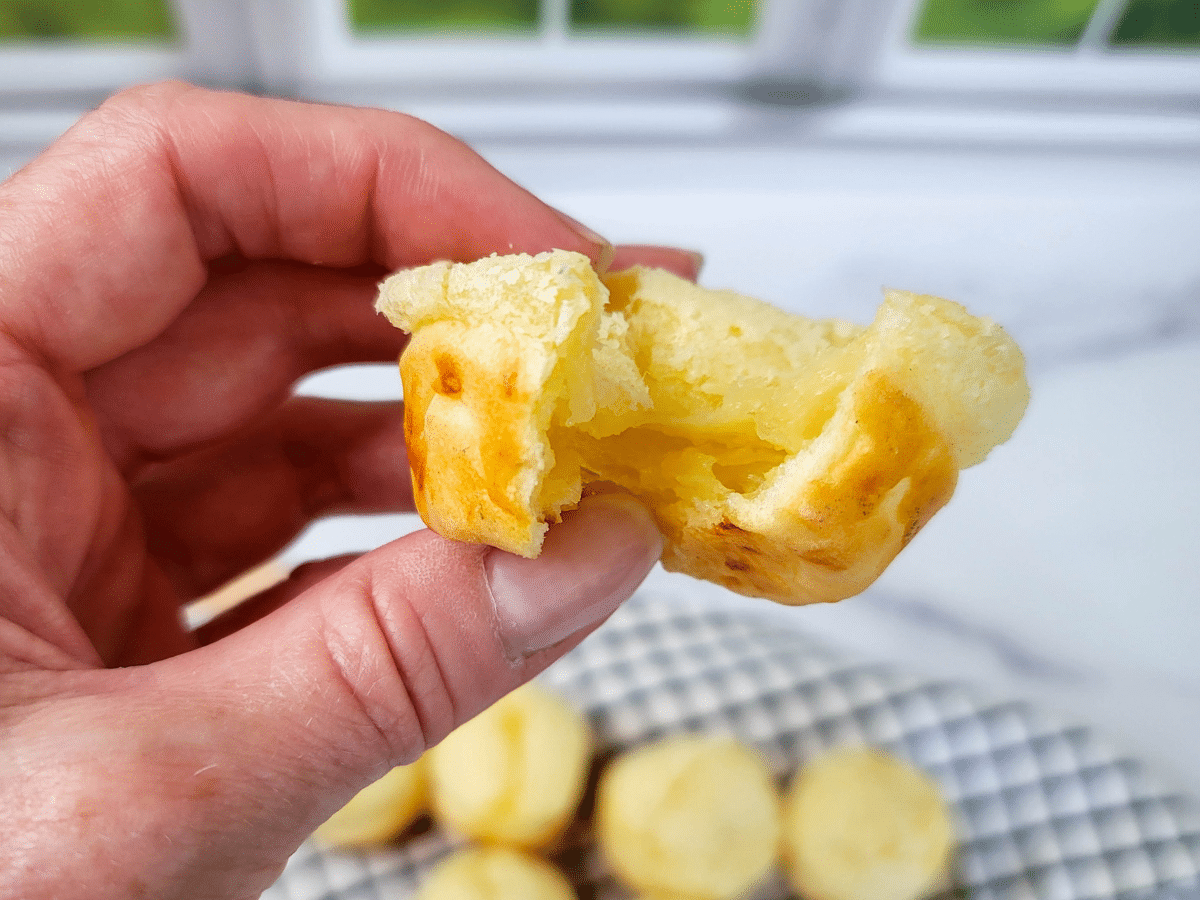
The cheesy chewy inside of Brazilian cheese bread.
Photo Credit: Sage Scott.

What is Brazilian Cheese Bread?

Brazilian cheese bread, or as the locals say, “pão de queijo,” is a bite-sized ball of cheesy, chewy goodness that’s the culinary equivalent of a warm hug from avó. Imagine biting into a perfectly crusty exterior only to discover an explosion of gooey, cheesy heaven on the inside. These Brazilian cheese puffs are kind of like that!

This delicious quick bread is made with tapioca flour, which means it’s naturally gluten free. That makes these chewy cheese bites a great option for people avoiding gluten, including those with celiac disease or gluten sensitivity.

Key Ingredients and Substitutions

There aren’t many ingredients needed to whip up a batch of Brazilian cheese bread, but a few ingredients matter more than they look like they should. Here’s what you’ll need:

Egg

Like most baked goods, this recipe works best with a room-temperature egg. A room-temperature egg blends more smoothly into the batter, helping these Brazilian cheese bread bites bake up lighter and more evenly.

Because eggs are an alpha-gal friendly ingredient, I haven’t tried this Brazilian cheese bread recipe with an egg substitute. But if you give it a go, leave me a comment and let me know how it works for you.

Milk

Because I’m once again able to consume small amounts of low-fat dairy products, I typically make Brazilian cheese bread with skim milk. However, you can easily substitute almond milk, oat milk, or soy milk if you are an alpha gal who avoids dairy.

Tapioca Flour

Tapioca flour gives Brazilian cheese bread its signature chewy texture. Unlike regular wheat flour, tapioca flour comes from cassava, also called yuca, and it behaves very differently in this recipe. That is why these little cheese bites puff up with crisp edges and tender, slightly stretchy centers.

Tapioca flour and tapioca starch are usually the same ingredient in the United States, so either label should work for this pão de queijo recipe. Look for it in the baking aisle, gluten-free section, international aisle, or online. Bob’s Red Mill, Anthony’s, and other gluten-free baking brands commonly sell it.

Do not swap in wheat flour, almond flour, coconut flour, or cassava flour. Cassava flour and tapioca flour both come from the cassava root, but they are not the same. Cassava flour uses more of the whole root, while tapioca flour is the extracted starch. In this Brazilian cheese bread recipe, that starch is what creates the chewy, popover-like texture. Use the wrong flour, and the results may be less pão de queijo and more “well, that was an interesting choice.”

Cheese

You can’t make an omelet without breaking a few eggs, and you can’t make Brazilian cheese bread without cheese. The good news is that you can use just about any cheese or combination of cheeses you want — including vegan cheese. I’ve made these bites with everything from aged Gouda to sharp cheddar to vegan cheddar cheese shreds. So whether you enjoy dairy or have to avoid it, you can still dig into a batch of these chewy cheese puffs.

Sage Advice: Whether you use low-fat, full-fat, vegetarian, or vegan varieties, other great cheeses to try in this recipe include white cheddar cheese, parmesan cheese, queso fresco, blue cheese, mozzarella cheese, and feta. You can even mix and match as long as your cheese of choice totals ½ cup.

Scroll down to the recipe card for a complete list of ingredients and the amounts needed to make this Brazilian cheese bread recipe.

Related Article: Is Cheese Vegetarian? Slicing Into the Truth

Wooden letter blocks arranged on a plain surface spell out the words "DAIRY FREE.
Photo Credit: Canva.

To Make Dairy-Free Brazilian Cheese Bread

Making dairy-free Brazilian cheese bread is simple, as long as you choose swaps that can handle the oven. The texture may be slightly different from traditional pão de queijo made with dairy milk and cheese, but the result is still warm, chewy, and snackable.

Here’s what I recommend:

  • Milk. Use plain, unsweetened plant-based milk. Almond milk, oat milk, soy milk, or pea protein milk can all work here. I usually reach for whatever I already know tastes good in savory recipes.
  • Cheese. Use your favorite dairy-free shredded cheese that melts well. Violife Just Like Cheddar Shreds are a good starting point, but any dairy-free cheese you enjoy in baked dishes should work.
  • Nonstick Spray. Choose a nonstick cooking spray or oil that fits your dietary needs. Olive oil or avocado oil are easy options for greasing the mini muffin pan.

Related Article: Dairy Free Baking: Proven Tips for Beginners

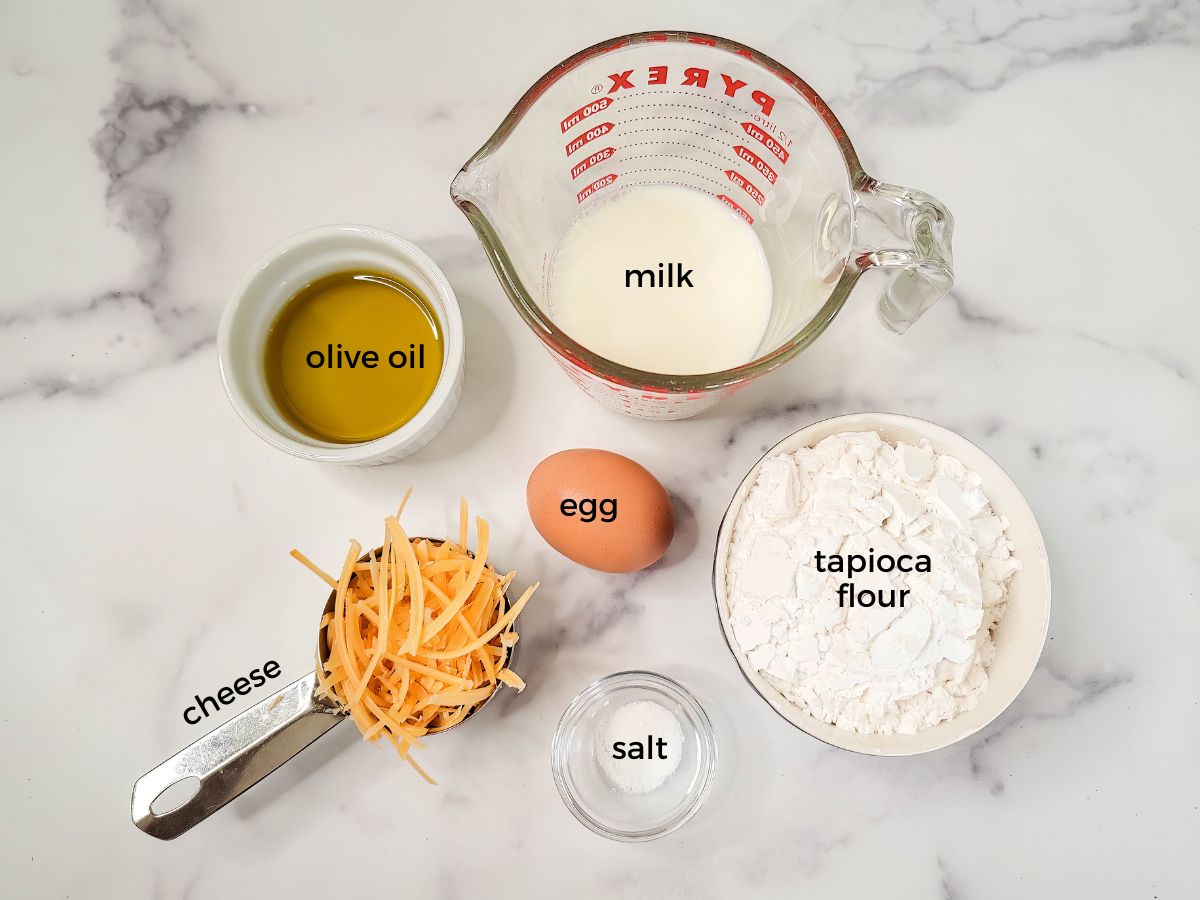
The ingredients needed to make Brazilian cheese bread include olive oil, mik, tapioca flour, and cheese.
Photo Credit: Sage Scott.

How to Make Brazilian Cheese Bread

This Brazilian cheese bread recipe comes together quickly, with the blender doing most of the work. Here’s a high-level look at the process:

  1. Preheat and prep. Heat the oven to 400°F and grease a mini muffin pan well with olive oil or nonstick cooking spray. This recipe must be baked in a mini muffin pan, which helps the batter bake into bite-sized Brazilian cheese puffs.
  2. Blend the batter. Add the egg, olive oil, milk, tapioca flour, cheese, and salt to a blender or food processor. Pulse until the batter is smooth, stopping to scrape down the sides as needed.
  3. Fill the mini muffin pan. Pour the batter evenly into the prepared cups, leaving a little space at the top so the Brazilian cheese puffs have room to rise.
  4. Bake until golden. Bake for 15 to 20 minutes, until the tops are puffed and lightly golden.
  5. Cool briefly and serve warm. Let the pão de queijo cool in the pan for about two minutes, then remove and serve while warm.

You can find step-by-step instructions in the recipe card below.

Sage Advice: Use a mini muffin pan for this recipe. The batter is thin and designed to bake into small Brazilian cheese balls with crisp edges and chewy centers. A standard muffin pan will not give you the same result, and pão de queijo deserves better than being set up for failure.

Tips for the Best Brazilian Cheese Bread

Brazilian cheese bread is easy, but it does have a few tiny bossy opinions. Follow these tips for the best texture and flavor.

  • Use tapioca flour, not regular flour. Tapioca flour is what gives pão de queijo its chewy center and crisp outside. Wheat flour will not work the same way, and cassava flour is not a one-for-one swap.
  • Grease the mini muffin pan well. These Brazilian cheese balls like to cling to the pan like they signed a lease. A good coating of cooking spray or oil helps them release cleanly after baking.
  • Use a mini muffin pan. This recipe is designed for a pourable blender batter, not a scoopable dough. A mini muffin pan helps the batter puff into bite-sized Brazilian cheese puffs with golden edges.
  • Blend the batter until smooth. You do not need to overthink this, but you do want the egg, milk, oil, tapioca flour, and cheese fully combined. A smooth batter bakes more evenly.
  • Fill each cup about three-fourths full. The batter puffs as it bakes, so give it a little room. Nobody needs a cheese bread volcano today, although there are worse kitchen problems.
  • Eat them warm when possible. Brazilian cheese bread tastes best fresh from the oven, when the outside is crisp and the inside is soft, chewy, and cheesy. Leftovers are still good, but warm pão de queijo is the main event.
  • Reheat leftovers before serving. A few minutes in the oven or air fryer helps bring back the crisp edges. The microwave works in a pinch, but it can soften the texture.
Brazilian Cheese Bread with Coffee
Photo Credit: Canva.

What to Eat with Brazilian Cheese Bread

In Brazil, these cheesy bread bites are served for breakfast, as an afternoon snack, or as a starchy side at dinnertime, so they blend in with any meal as efficiently as a Rainforest chameleon.

Serve them with soup, salad, grilled chicken, eggs, or your favorite alpha-gal friendly main dish. They also make a dangerously good snack with jam, which I’m calling breakfast-adjacent and refusing to discuss further.

How to Store and Reheat Brazilian Cheese Bread

Brazilian cheese bread tastes best fresh from the oven, when the outside is crisp and the center is warm and chewy. That said, leftovers are still worth saving. I would never ask you to throw away cheese bread. I have boundaries.

Let the pão de queijo cool completely, then store it in an airtight container in the refrigerator for up to 3 days. To reheat, place the Brazilian cheese bread in a 350°F oven for 5 to 8 minutes, or warm it in an air fryer for a few minutes until heated through and lightly crisp again.

You can use the microwave when time is tight, but the texture will be softer. It gets the job done, but it will not bring back the same crisp edges.

Can You Freeze Brazilian Cheese Bread?

Yes, you can freeze baked Brazilian cheese bread. Let the cheese bread cool completely, then place the pieces in a single layer on a baking sheet and freeze until solid. Transfer them to a freezer-safe bag or container and freeze for up to 2 months.

To reheat frozen Brazilian cheese bread, place the frozen pieces in a 350°F oven for 10 to 12 minutes, or until warm in the center and lightly crisp on the outside. An air fryer also works well for small batches.

I recommend freezing the baked cheese bread rather than the batter for this blender version. Some traditional pão de queijo recipes freeze shaped dough before baking, but this recipe uses a pourable batter made for a mini muffin pan. Unless you test freezing the batter in the muffin cups first, baked-and-reheated is the safer path.

FAQs About Brazilian Cheese Bread

Is Brazilian cheese bread gluten free?

Yes, Brazilian cheese bread is naturally gluten free. It’s made with tapioca flour instead of wheat flour, so these tasty little cheese bites can work well for people avoiding gluten, including those with celiac disease or gluten sensitivity.

Is Brazilian cheese bread the same as pão de queijo?

Yes. Brazilian cheese bread is the English name for pão de queijo, a small Brazilian cheese bread made with tapioca flour, cheese, eggs, milk, oil, and salt. Unlike regular dinner rolls, pão de queijo does not use wheat flour or yeast, which gives it that crisp outside and chewy, cheesy center.

What’s the difference between tapioca flour and tapioca starch?

Tapioca flour and tapioca starch are essentially the same thing. In fact, the front of Bob’s Red Mill tapioca flour package says “also known as tapioca starch.” Whether you call it tapioca flour or tapioca starch, it’s a very fine, white flour made from the root of the cassava plant native to South America.

Can I make Brazilian cheese bread dairy free?

Yes, you can make dairy-free Brazilian cheese bread by using plain, unsweetened dairy-free milk and dairy-free shredded cheese that melts well. Always check labels carefully and remember that tolerance varies from person to person.

More Alpha-Gal Friendly Quick Bread Recipes

Several golden, round cheese bread rolls (pão de queijo) arranged on a white plate lined with a black and white checkered cloth.

Brazilian Cheese Bread (with Dairy-Free Substitution)

These gluten-free, cheesy, bite-size gems are crispy on the outside with a chewy, cheesy center. Perfect as a snack, appetizer, or side dish, they’re a taste of Brazil that’s easy to make in your kitchen. (Recipe inspired by Bob’s Red Mill.)
4.97 from 171 votes
Prep Time 5 minutes
Cook Time 20 minutes
Total Time 25 minutes
Course Breakfast, Side Dish, Snack
Cuisine Brazilian
Servings 12
Calories 122 kcal

Ingredients
  

  • Nonstick cooking spray
  • 1 egg, at room temperature
  • ¼ cup olive oil
  • cup milk (see notes to make dairy-free)
  • 1 ½ cups tapioca flour (I used Bob’s Red Mill)
  • ½ cup grated cheese (see notes to make dairy-free)
  • ½ teaspoon salt

Instructions
 

  • Preheat oven to 400 F.
  • Grease a mini muffin pan with olive oil or nonstick cooking spray and set aside. (You must use a mini muffin tin. This recipe does not work in a standard or jumbo muffin pan.)
  • Combine all ingredients in a blender or food processor. Pulse until ingredients are thoroughly combined, stopping to scrape down the sides of the blender with a spatula as needed.
  • Pour batter evenly into greased muffin tins, leaving about ⅛” of space at the top. (If you use a silicone muffin pan, place it on a baking sheet before placing it in the oven.)
  • Bake in preheated oven for 15-20 minutes until the tops of the bread bites are golden brown.
  • Cool in the pan on a wire rack for two minutes. Then remove the bread from the pan and serve immediately.

Notes

  • See details above to make this recipe dairy-free.
  • It’s absolutely essential that you use a mini muffin tin to create these bite-sized Brazilian treats. They will not work in a regular muffin tin.

Nutrition

Serving: 2 piecesCalories: 122kcalCarbohydrates: 14gProtein: 2gFat: 7gSaturated Fat: 2gPolyunsaturated Fat: 1gMonounsaturated Fat: 4gTrans Fat: 0.002gCholesterol: 20mgSodium: 138mgSugar: 1gCalcium: 52mgIron: 0.3mg

Please Note: Nutrition information is automatically calculated. It should only be used as an approximation.

Tried this recipe?Let me know how it was!

No Artificial Intelligence

Every recipe I share has been cooked in my kitchen, photographed by me, and taste tested by my very patient family. No AI-generated slop here! If it’s on Sage Alpha Gal, it’s because I made it, loved it, and would gladly put it on my table again.

A yellow circular graphic with the words "Recipes," "Photos," and "Flavor" around the edge, and the word "REAL" in red capital letters at the center.

Thank you for sharing!

Similar Posts

22 Comments

  1. 5 stars
    I had never heard of Brazillian bread until yesterday. I baked this bread and oh my! It was unbelievably delicious and cheesy good. Your steps were easy to understand. Will make it again.

  2. I love these homemade Brazilian cheese bread bites. It’s an absolute delight! The crispy exterior and its chewy, cheesy center are truly a taste sensation. It’s worth a try, and I would definitely make some over the weekend!

  3. 5 stars
    Mmmm! You had me at cheese! I love a lot of Brazilian recipes and this was no different. Cheesy and delicious. We served them with soup instead of bread and it was a great combo.

  4. 5 stars
    Always heard good things about this cheese bread, and when this came across my feed I knew I had to make them. They were oddly a perfect addition to our cookout last night – so fluffy and light!

  5. 5 stars
    Just baked these little cheese bread puffs. The cheese inside was melty and gave them fantastic flavor. They were so simple to make too!

  6. 5 stars
    These were light and chewy and full of cheesy flavor. I had never heard of this before, but I ran across your post and decided to give them a try. Delicious! Thanks for the great recipe.

  7. 5 stars
    Tried the dairy-free version with almond milk and vegan cheese, and it was really delicious! Crispy outside and chewy inside. It’s my new favorite snack!

  8. 5 stars
    Cheese lover here! Tried it and it was really good! Definitely a perfect addition to my favorite bread recipes list 🙂

  9. These are okay, I may have done something wrong. I tried twice. I have been baking for a long time, but used a regular muffin tin. The first time I filled it 3/4 of the way, but kept putting it back in the oven. The second time I filled it up 1/4 of the way, but they still seemed doughy in the middle. Do I NEED to use the mini pans? Or am I doing something wrong?

    1. Hi Jess! This recipe is written for a mini muffin tin, and in my experience Brazilian cheese bread is always a bite-sized treat (and never a full-sized muffin). If you’re willing to give them one more go (and you use a mini muffin tin), I am confident you’ll have much better results! P.S. Based on your feedback, I’m going to update this recipe to make it more clear that it’s super important to use a mini muffin tin for this recipe. After all, most recipes can flex between the two, so others might try that and be similarly frustrated.

4.97 from 171 votes (160 ratings without comment)

Leave a Reply

Your email address will not be published. Required fields are marked *

Recipe Rating